
Overview
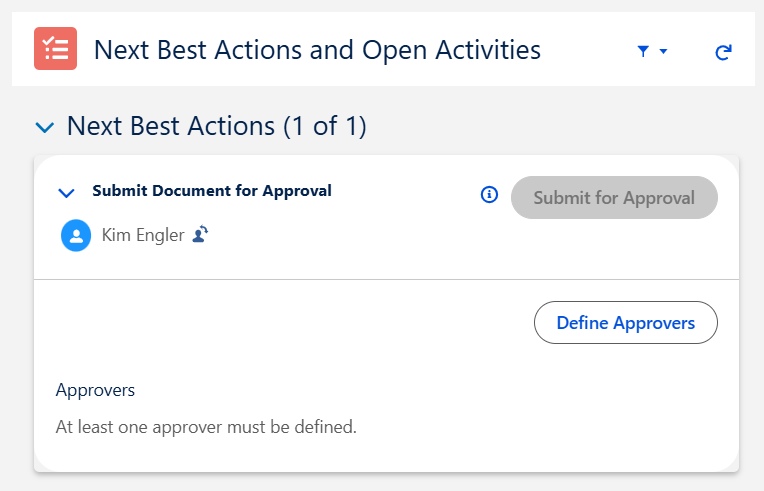
At least one Approver must be added to various CQ records in order for the record to move to the next Stage/Status.
Prerequisites
Available in: All Records with Approvals
Installed Package: CQ Approval - Winter 2025
User Profile: Standard User
Permissions: CQ Base User PSG and CQ Record Owner PSG
Users: Active Users for Approval assignments
Queues: Optional, see Queues
Job Functions: Optional, see Job Functions
Instructions
-
From the CQ record, click the Define Approvers button under Next Best Actions.
-
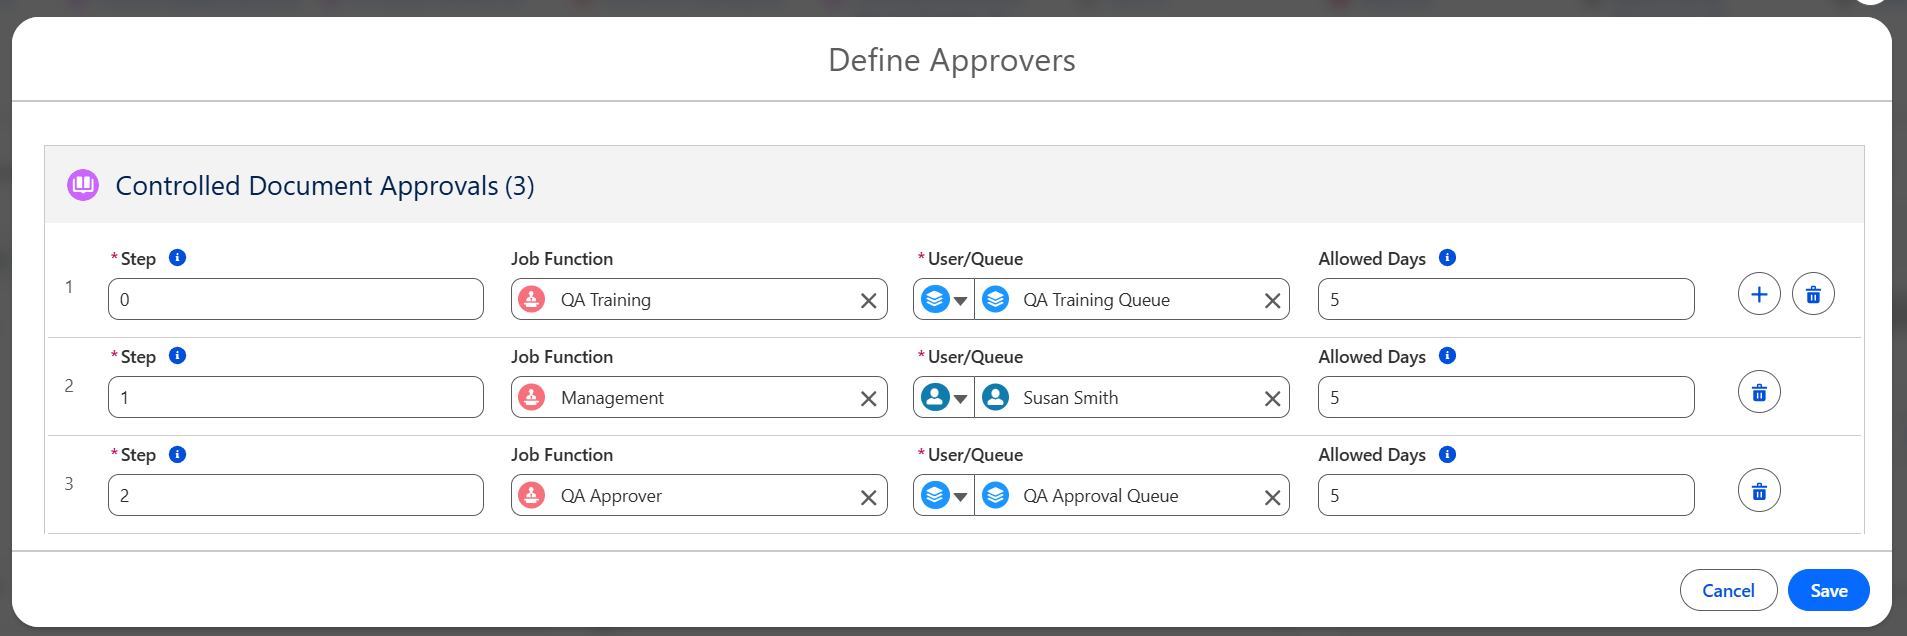
Enter the Step number to indicate the order in which approval transactions will occur.
-
If Step 0 is defined, it acts as an anytime approval step, becoming active immediately upon submission along with the lowest non-zero level steps in a multi-level workflow.
-
Anytime approval steps can be completed at any point in the workflow before, during, or after other levels as long as they are finished before the process is closed.
-
The approval process is complete only when all steps including Step 0 and all non-zero levels are successfully finished.
-
Anytime approval steps allow actions by a Delegated Approver (Approve, Reject, Recall, Reassign) if the delegation is set in the user profile before the step is activated.
-
Anytime approval steps will support the User/Queue, with or without an associated Job Function.
-
Optionally, select a Job Function if indicating that only assigned approvers can complete the step, and they must be current on required training to perform the approval.
-
Select User or Queue, then search and select the User or Queue name for the Approval Step. If Job Function is entered, then only associated Users/Queues will display for selection.
-
Optionally, enter the Allowed Days to complete the approval. Overdue Approvals can be tracked by creating a Report in CQ.
-
Click the + icon to add additional Approvers. Click the Trash icon to remove any Approvers.
-
Click the Save button.
Results
-
Approvers are added and assigned by Step number and by Stage.
-
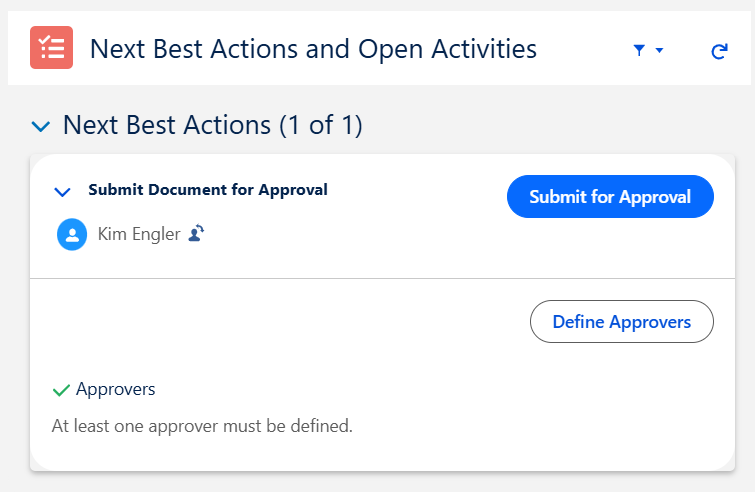
The Submit for Approval button is now activated under Next Best Actions.
-
A newly added green checkmark indicates that at least one Approver exists.
-
Record can now be Submitted for Approval.
Troubleshooting
Additional Resources
CQ Resources
-
Submitting Approvals
-
Recalling Approvals
-
Reassigning Approvers
-
Completing Approvals
-
Comparing Documents for Approval
Summer 2026