
Creating CAPAs
For Permission Set Groups: CQ Base User PSG, CQ CAPA Owner PSG
A CAPA for a Product or Process (Operations, Standard Services) needs to be created and recorded in CQ.
-
From the CAPAs tab, select + New CAPA from the drop-down arrow or click the New button.

-
Select a Record Type: CAPA (for a Standard CAPA). Click the Next button.
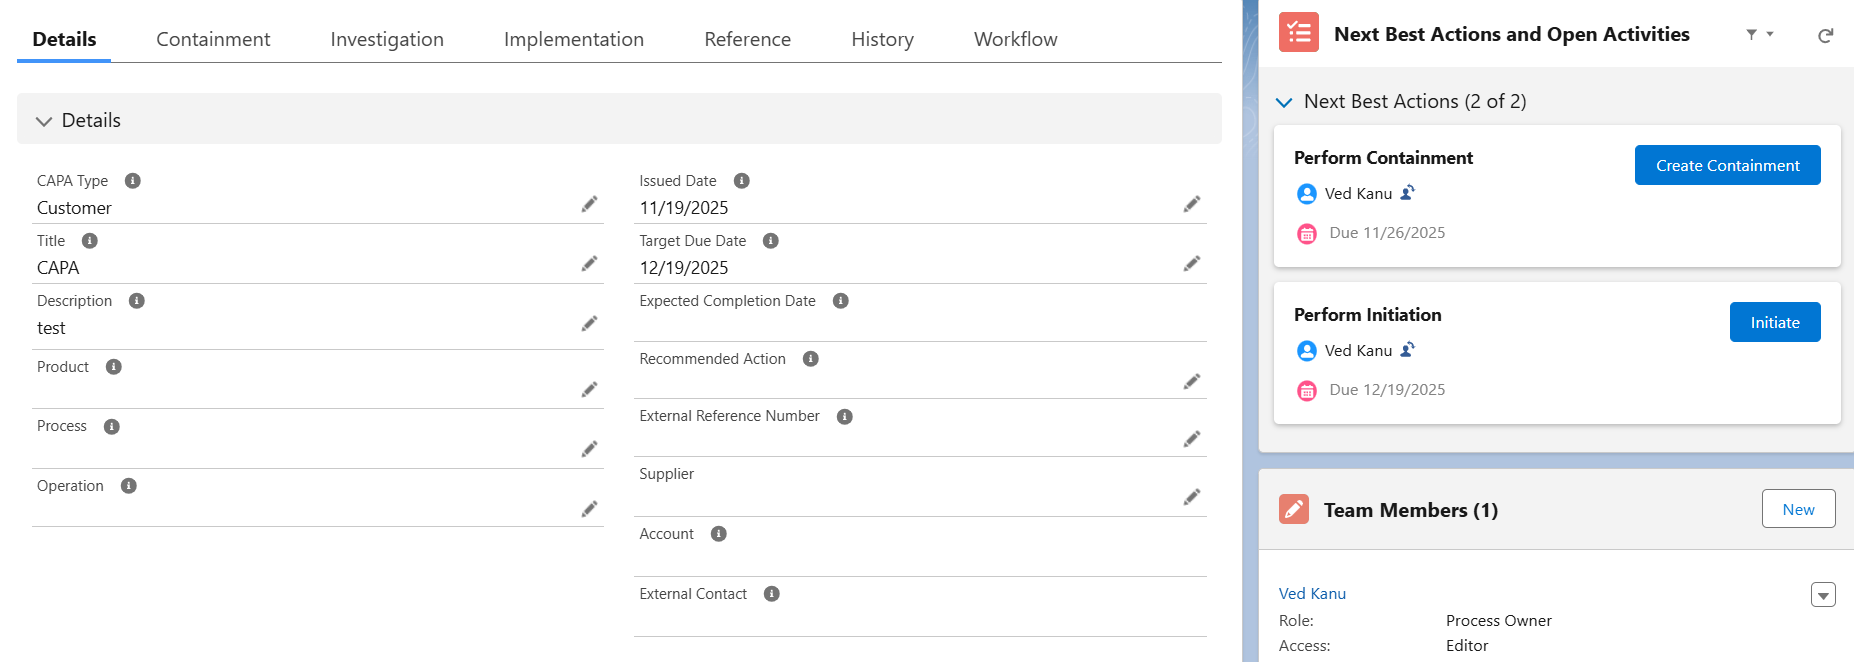
Details
-
Select the CAPA Type: Supplier (default), Internal, or Customer.
-
Enter the Title.
-
Enter the Description.
-
Optionally, select Product and/or Process and/or enter Operation involved with the CAPA.
-
Enter or select the Issued Date (defaults to current date).
-
Enter or select the Target Due Date for completion of the CAPA (defaults to 30 days from current date).
-
Optionally, enter the Recommended Action.
-
Select the Supplier if CAPA Type selected was Supplier. (Field not present if CAPA Type selected was Internal or Customer.)
-
Optionally, enter an External Reference Number. (If the CAPA was created from an NC, the NC record number will autopopulate.)
-
Optionally, select the Account if CAPA Type selected was Customer. If CAPA Type selected was Supplier then it auto populates the Account associated with the Supplier or else it is an read only field. (Field not present if CAPA Type selected was Internal.)
-
Select the External Contact if CAPA Type selected was Customer (optional) or Supplier (associated Supplier Contacts) . (Field not present if CAPA Type selected was Internal.)
Ownership
-
Select the CAPA Coordinator (i.e., a User who may be responsible for replying to the CAPA later for Investigation).
-
Optionally, select the CAPA Sponsor (Required if Internal) (i.e., upper management who may be responsible for the area affected by the CAPA).
-
Optionally, select Org. Division, Org. Business Unit, Org. Region, Org. Site, and Location.
-
Optionally, select Department responsible for the CAPA.
Risk
This is a generalized Risk Assessment feature in the baseline CAPA component. See your CQ Representative to discuss Options for configuring CQ's Risk Management component to conduct more comprehensive Initial and Final Impact Assessments for CAPAs which can be viewed under the CAPA Reference tab.
-
Optionally, select the Severity/Consequence of the risk if the issue that led to the CAPA continues to occur.
-
Optionally, select the Probability/Likelihood that the issue that led to the CAPA will continue to occur if not addressed.
-
Optionally, enter the Risk Justification explaining why the issue that led to the CAPA presents a risk of this Severity and/or Probability.
-
Risk Level is a read-only field that is calculated according to the selected Severity/Consequence and Probability/Likelihood and will autopopulate upon saving.
Files
-
Optionally, Drop/Upload Files associated with the CAPA record. (Files can also be added at any time after the CAPA record has been created and is not yet closed.)
-
Click the Save button or Save & New for additional CAPAs.
Results
-
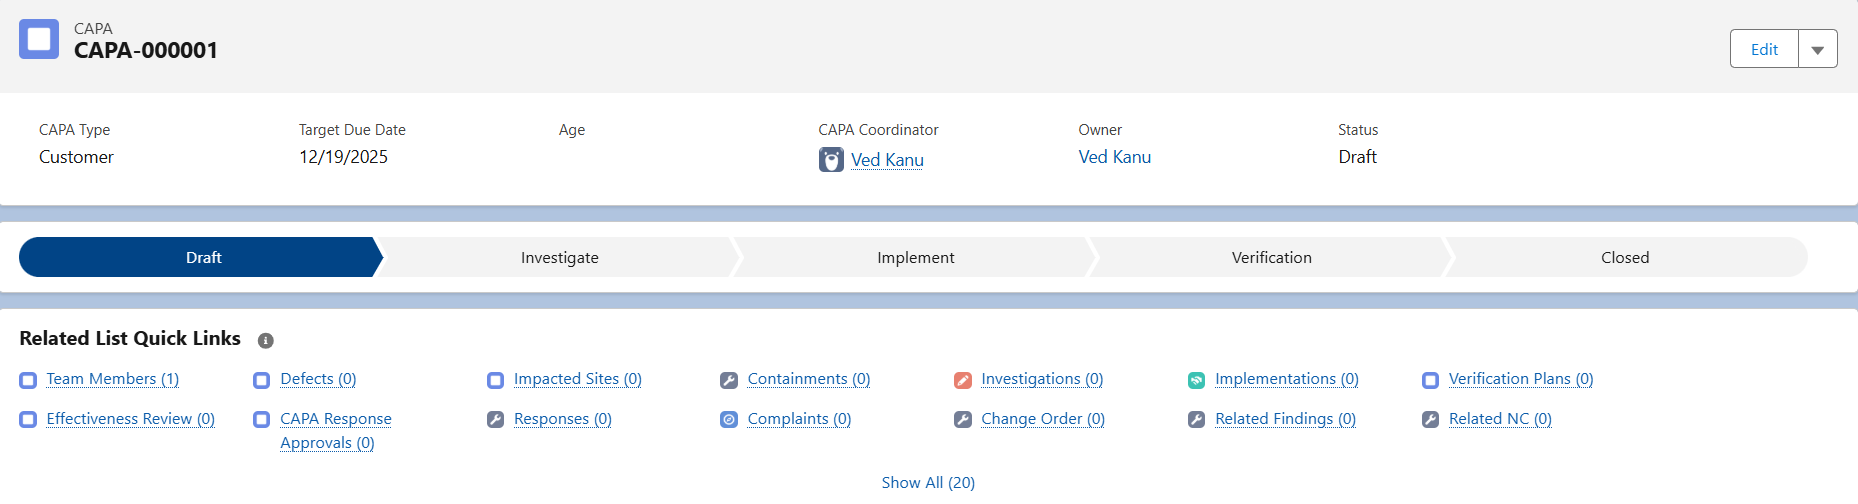
The new CAPA record is created and assigned a unique number.
-
The Owner of the CAPA record defaults to the User who created it.
-
The CAPA record is in a Draft Status and Draft Stage.
-
Under Next Best Actions and Open Activities, in the Perform Containment section, the Create Containment button is enabled, and in the Perform Initiation section, the Initiate button is enabled. The Owner for both tasks is the User who created the CAPA record. Due Date and Change Owner icons are available for both tasks.